Wednesday, February 9, 2022

The Birds and the Bees (Part 1)


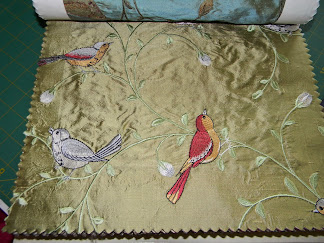
Many times over the years, I've dragged this upholstery fabric sample book out of storage to contemplate how these beautiful embroidered birds might be used in a wall quilt.


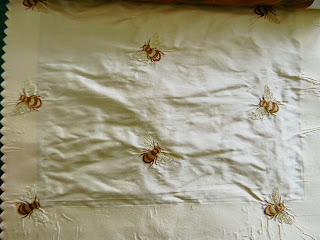
The sample book was given to me--along with 140 others--by an art teacher who was moving house and clearing things out. These are just a few of the fabrics; there are others as well, all  in the same sample book.

Originally I thought I'd cut the birds (and bees) out of the fabric and use them in landscape quilts, discarding the backgrounds.

But the backgrounds are 100% silk, as are the embroidery threads...why not strategically cut the birds apart along with some of the background, which includes lovely stems and leaves, and feature them as panels in a (non-landscape) wall quilt?

So the first one was completed this week, except for a hanging sleeve, and 3 other bird (and bees--who chose not to fly into this one) quilts are now in various stages of progress. This first one is the most neutral in tone; the others will be more colorful.
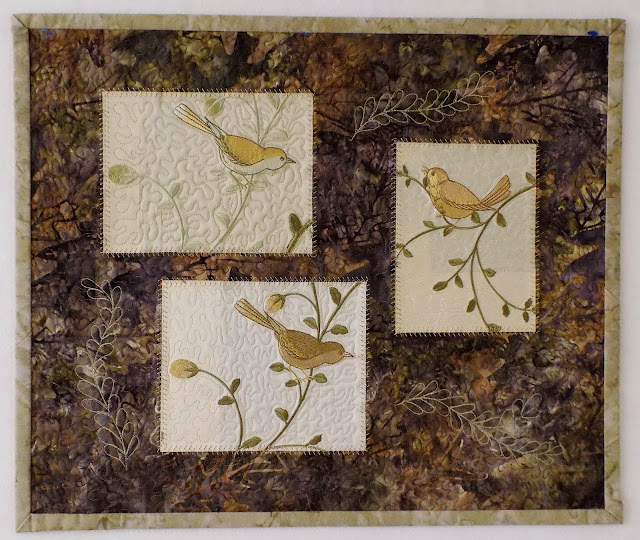
The three panels were fused onto the batik print background with Steam-a-Seam II Lite, then edge-stitched with a programmed sewing-machine stitch in the heirloom category, with tear-away stabilizer pinned behind each panel. Fusible fleece was gently fused (no pressure with the iron, just heat) to the entire back using parchment paper between the iron and the fusible fleece. A backing fabric was then pin-basted beneath them in preparation for quilting. The backgrounds, both the batik and the silk panels, were free-motion stippled in matching polyester threads, but not before a few free-motion "feathers" were stitched in contrasting thread, where space allowed. The quilt was then steam-blocked and checked for squareness. Binding was made with 3-1/4-inch-wide batik strips on the sewing machine and handsewn on the back. Here are a few closeups, and a texture shot (click on photos to enlarge):
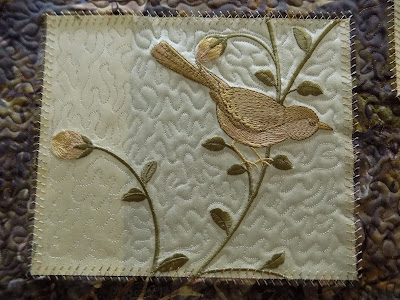
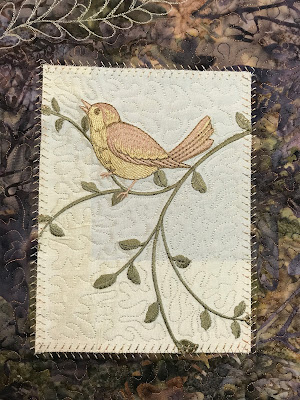


You can vaguely see the shadow of the paper frames that bordered the backs of the fabrics in the sample book. Removing those paper frames was an impossibility--obviously a very tough industrial glue was used. I quickly decided the paper frame shadows would be part of the quilt's charm, as well as a shout-out to creative recycling. 😊
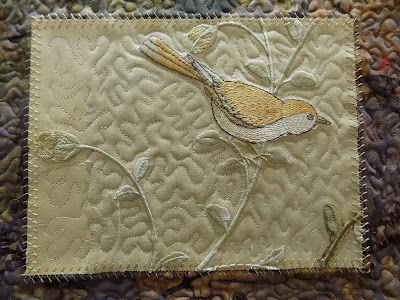


This next photo was taken before the quilt was stippled, but it displays the lovely heirloom machine-stitching better.
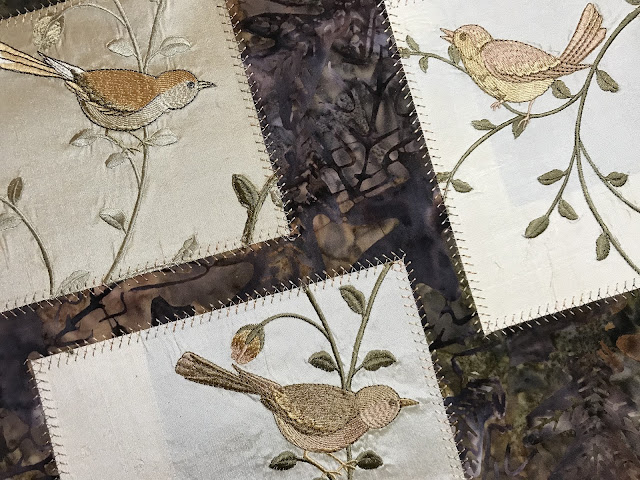

And last is the "texture shot"...the lighting in the room always necessitates a horizontal angle to convey it best. (Not sure where that piece of red fuzz came from, but it's gone now. 😏)


I hope you'll try this if you happen to have, or can get hold of, an upholstery sample book featuring beautiful embroidery.

Thanks for stopping by!

Linda

Sunday, November 28, 2021

Belated Halloween

Last post, I promised a Halloween project would be up next. Well now it's Christmas season, but you know what? I finished the larger of the two Halloween projects just yesterday, so I'm going with it anyway! (And now the decks are cleared for something new.)

This first one did get finished in time to hang on the living room wall for Halloween...


I have never loved a Halloween panel as much as I do this one. It's from Wilmington Prints titled, "Frightful Night Haunted House Panel."

Here are some closeups of the free-motion quilting (click on any one to enlarge).


The house was the most difficult section to quilt, as I was using dark mono-filament on black fabric. So believe me, the stones/bricks were stitched more by instinct than by sight. This house reminded me of the original Addams Family TV series, which I loved, and I think that and the black cat (adore black cats) were what sold me on the panel.

The second, coordinating project was made from a "layer cake" (forty-two 10-inch squares) of companion fabrics from Wilmington. That's the one that just got finished yesterday. (As is often the case, life got in the way.)


As you can see, the back is more of a Thanksgiving quilt, which is fine--dual duty. The last photo is to show how I cheated by sewing the label on right through the front of the quilt. Since orange thread was used in the needle and purple thread was in the bobbin, the stitching is almost invisible in the front.

This is for my granddaughter but it will stay at our house for her to use it when she's here.

Happy Holidays!!

Linda

Friday, October 22, 2021

The Tattooed Heron

 Finished my heron quilt a few weeks ago but am just now getting around to posting. Three-quarters of the way through it, I still wasn't happy with it, so decided to just start playing and experimenting....which I should have done in the first place. Liking it much better now that the shells and yarns have been added.

The Tattooed Heron 27 in. x 47 in.

Here are some closeups...


And one that better shows the texture...


Next time, a Halloween panel that I just couldn't resist buying and quilting!

Linda

Tuesday, August 10, 2021

Heron Quilt

So far this summer has been full of activity, very little of it landscape quilting. But in late spring one had been started on the design wall--using, of all things, one of those "ugly" skies I painted...


...and a heron I sketched. More about him in a moment.


Some hills and trees had been auditioned...


as were boulders and other elements not shown here, including a boat and an eagle.


The heron and the smaller elements were temporarily removed so that the background could be basted and quilted more easily.


After eight weeks of yardwork and a couple of other projects, work was begun on designing the heron's feathers. There are now 8 discarded sketches and tracing paper all over the place. One keeper as of yesterday, not shown here.


I did stitch out two of the discarded designs as practice/test pieces, using different yellow/gold threads, with tracing paper on top.


It quickly became apparent that ordering some Golden Threads Quilting Paper would be a good idea, as the tracing paper was a bit difficult to remove. In the last photo, much of the tracing paper is still on--after all, it was practice only, so I abandoned the effort.


The Golden Threads paper was delivered Saturday, so tracing the final design on it will be the next step, and then stitching it out on batted fabric, later to be appliqued.

Happy mid-summer or mid-winter, depending on your hemisphere!

Linda