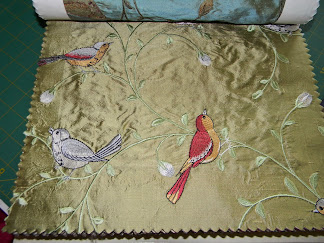
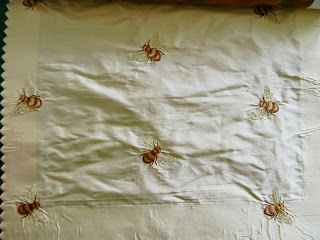

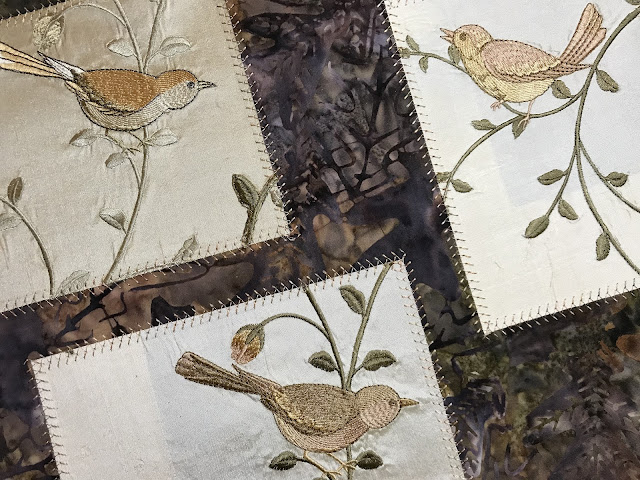
Originally I thought I'd cut the birds (and bees) out of the fabric and use them in landscape quilts, discarding the backgrounds.
But the backgrounds are 100% silk, as are the embroidery threads...why not strategically cut the birds apart along with some of the background, which includes lovely stems and leaves, and feature them as panels in a (non-landscape) wall quilt?
So the first one was completed this week, except for a hanging sleeve, and 3 other bird (and bees--who chose not to fly into this one) quilts are now in various stages of progress. This first one is the most neutral in tone; the others will be more colorful.
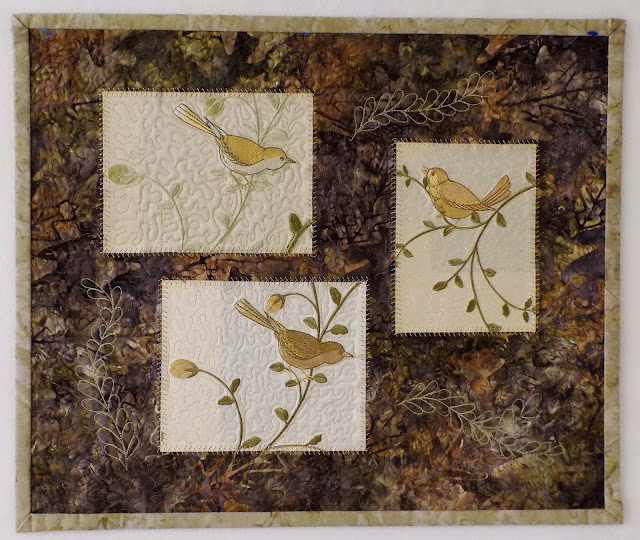
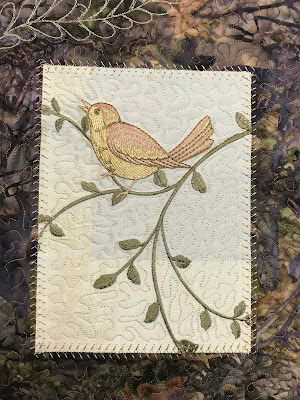
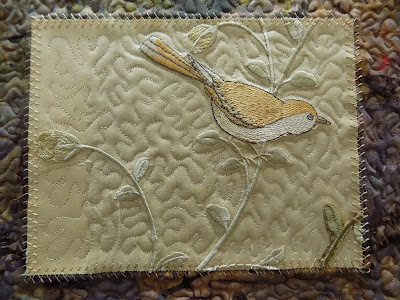
The three panels were fused onto the batik print background with Steam-a-Seam II Lite, then edge-stitched with a programmed sewing-machine stitch in the heirloom category, with tear-away stabilizer pinned behind each panel. Fusible fleece was gently fused (no pressure with the iron, just heat) to the entire back using parchment paper between the iron and the fusible fleece. A backing fabric was then pin-basted beneath them in preparation for quilting. The backgrounds, both the batik and the silk panels, were free-motion stippled in matching polyester threads, but not before a few free-motion "feathers" were stitched in contrasting thread, where space allowed. The quilt was then steam-blocked and checked for squareness. Binding was made with 3-1/4-inch-wide batik strips on the sewing machine and handsewn on the back. Here are a few closeups, and a texture shot (click on photos to enlarge):
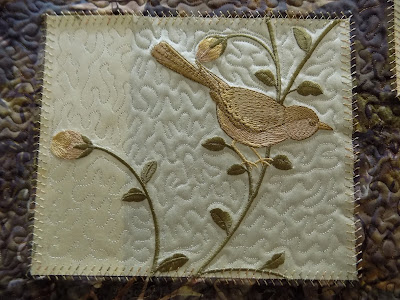
You can vaguely see the shadow of the paper frames that bordered the backs of the fabrics in the sample book. Removing those paper frames was an impossibility--obviously a very tough industrial glue was used. I quickly decided the paper frame shadows would be part of the quilt's charm, as well as a shout-out to creative recycling. 😊
This next photo was taken before the quilt was stippled, but it displays the lovely heirloom machine-stitching better.

I hope you'll try this if you happen to have, or can get hold of, an upholstery sample book featuring beautiful embroidery.
Thanks for stopping by!
Linda
Gorgeous! The border stitching is amazing. Upholstery books are treasures.
ReplyDeleteI tried soaking the paper band off a thick cotton woven sample, and made a mess of it.
Thank you! Yes, I can't believe how much time I've wasted trying to peel the paper off. Not worth it!
DeleteLovely! And even better that it's recycling. I wonder if any of the 'remains' could be turned into something like greeting cards or postcards.
ReplyDeleteHi MA! Thanks, and yes I would imagine they would work beautifully for either one. Great idea!
DeleteFabulous! I think I'll look at eBay for a similar book. Thanks so much for this detailed process post. If I find one I'm going to try it. Blessings, Linda.
ReplyDeleteOh, good, and I hope you find some quickly. I never thought of eBay! I forgot to say what a fun process this was. I really enjoyed it. Nice break from landscape quilting!
Delete