Wednesday, September 21, 2022

A Visit to the Creek

 A Visit to the Creek features a doe and her fawn making tracks toward their favorite water source. Designing and working on this scene helped keep me cool during some very hot weather this summer--and has me looking forward to winter.

28" wide x 33" high

I'm thinking the black forest fabric was among the Halloween offerings in Annie's Crafts (https://www.anniescatalog.com/) catalog last fall. If not, then I probably bought it at The Quilter's Trunk in Liberty, KY (www.quilterstrunk.com). The snow and water fabrics definitely came from the shop in Liberty. There are just eight different fabrics in this scene.

The largest tree began as a strip of gray hand-dyed (from the same fabric as the snow--a gradient that ran from white to dark gray). Free motion quilting gave it a tree-bark texture, while white fabric and white paint added bits of snow. Shading and the hollow were done with a black paint marker, while highlights were added with a silver Sharpie. Here's the before and after:


And a couple of closeups:


I started the quilt in mid-June, and have worked on it fairly regularly. It should be "sleeved," labeled and listed in my Etsy shop soon.

Thanks for stopping by, and happy autumn!

Linda

Tuesday, April 12, 2022

Quilting with Parkinson's


April is Parkinson's Awareness Month, so I'm thinking, what better time to address the "elephant in the room" at Linda's Landscape Quilts?

Over the years in my blog, I've occasionally mentioned shoulder and neck issues, but in 2018 a tremor began in my left hand. For a while I suspected it was a condition known as "essential tremor", but as it eventually worsened, it was time to see a neurologist. Four weeks before the Covid lockdowns in 2020, I was diagnosed with PD.

This is a gradual "degenerative" condition, but aside from tremor medication, proper nutrition and rest, it particularly responds well to exercise. Quilting is fairly sedentary, other than moving from the sewing machine to the cutting table to the ironing board. Consequently a fair chunk of of my usual designing/quilting time has been spent walking and gardening (hence the less frequent blog posts) for the last couple of springs, summers and autumns. I'm working on getting the nerve up for winter walking--cold is not a friend to the muscle stiffness and tremor inherent with PD, so an indoor yoga regimen or a gym membership may be in the offing.

What has this to do with quilting, other than loss of time? Everything.

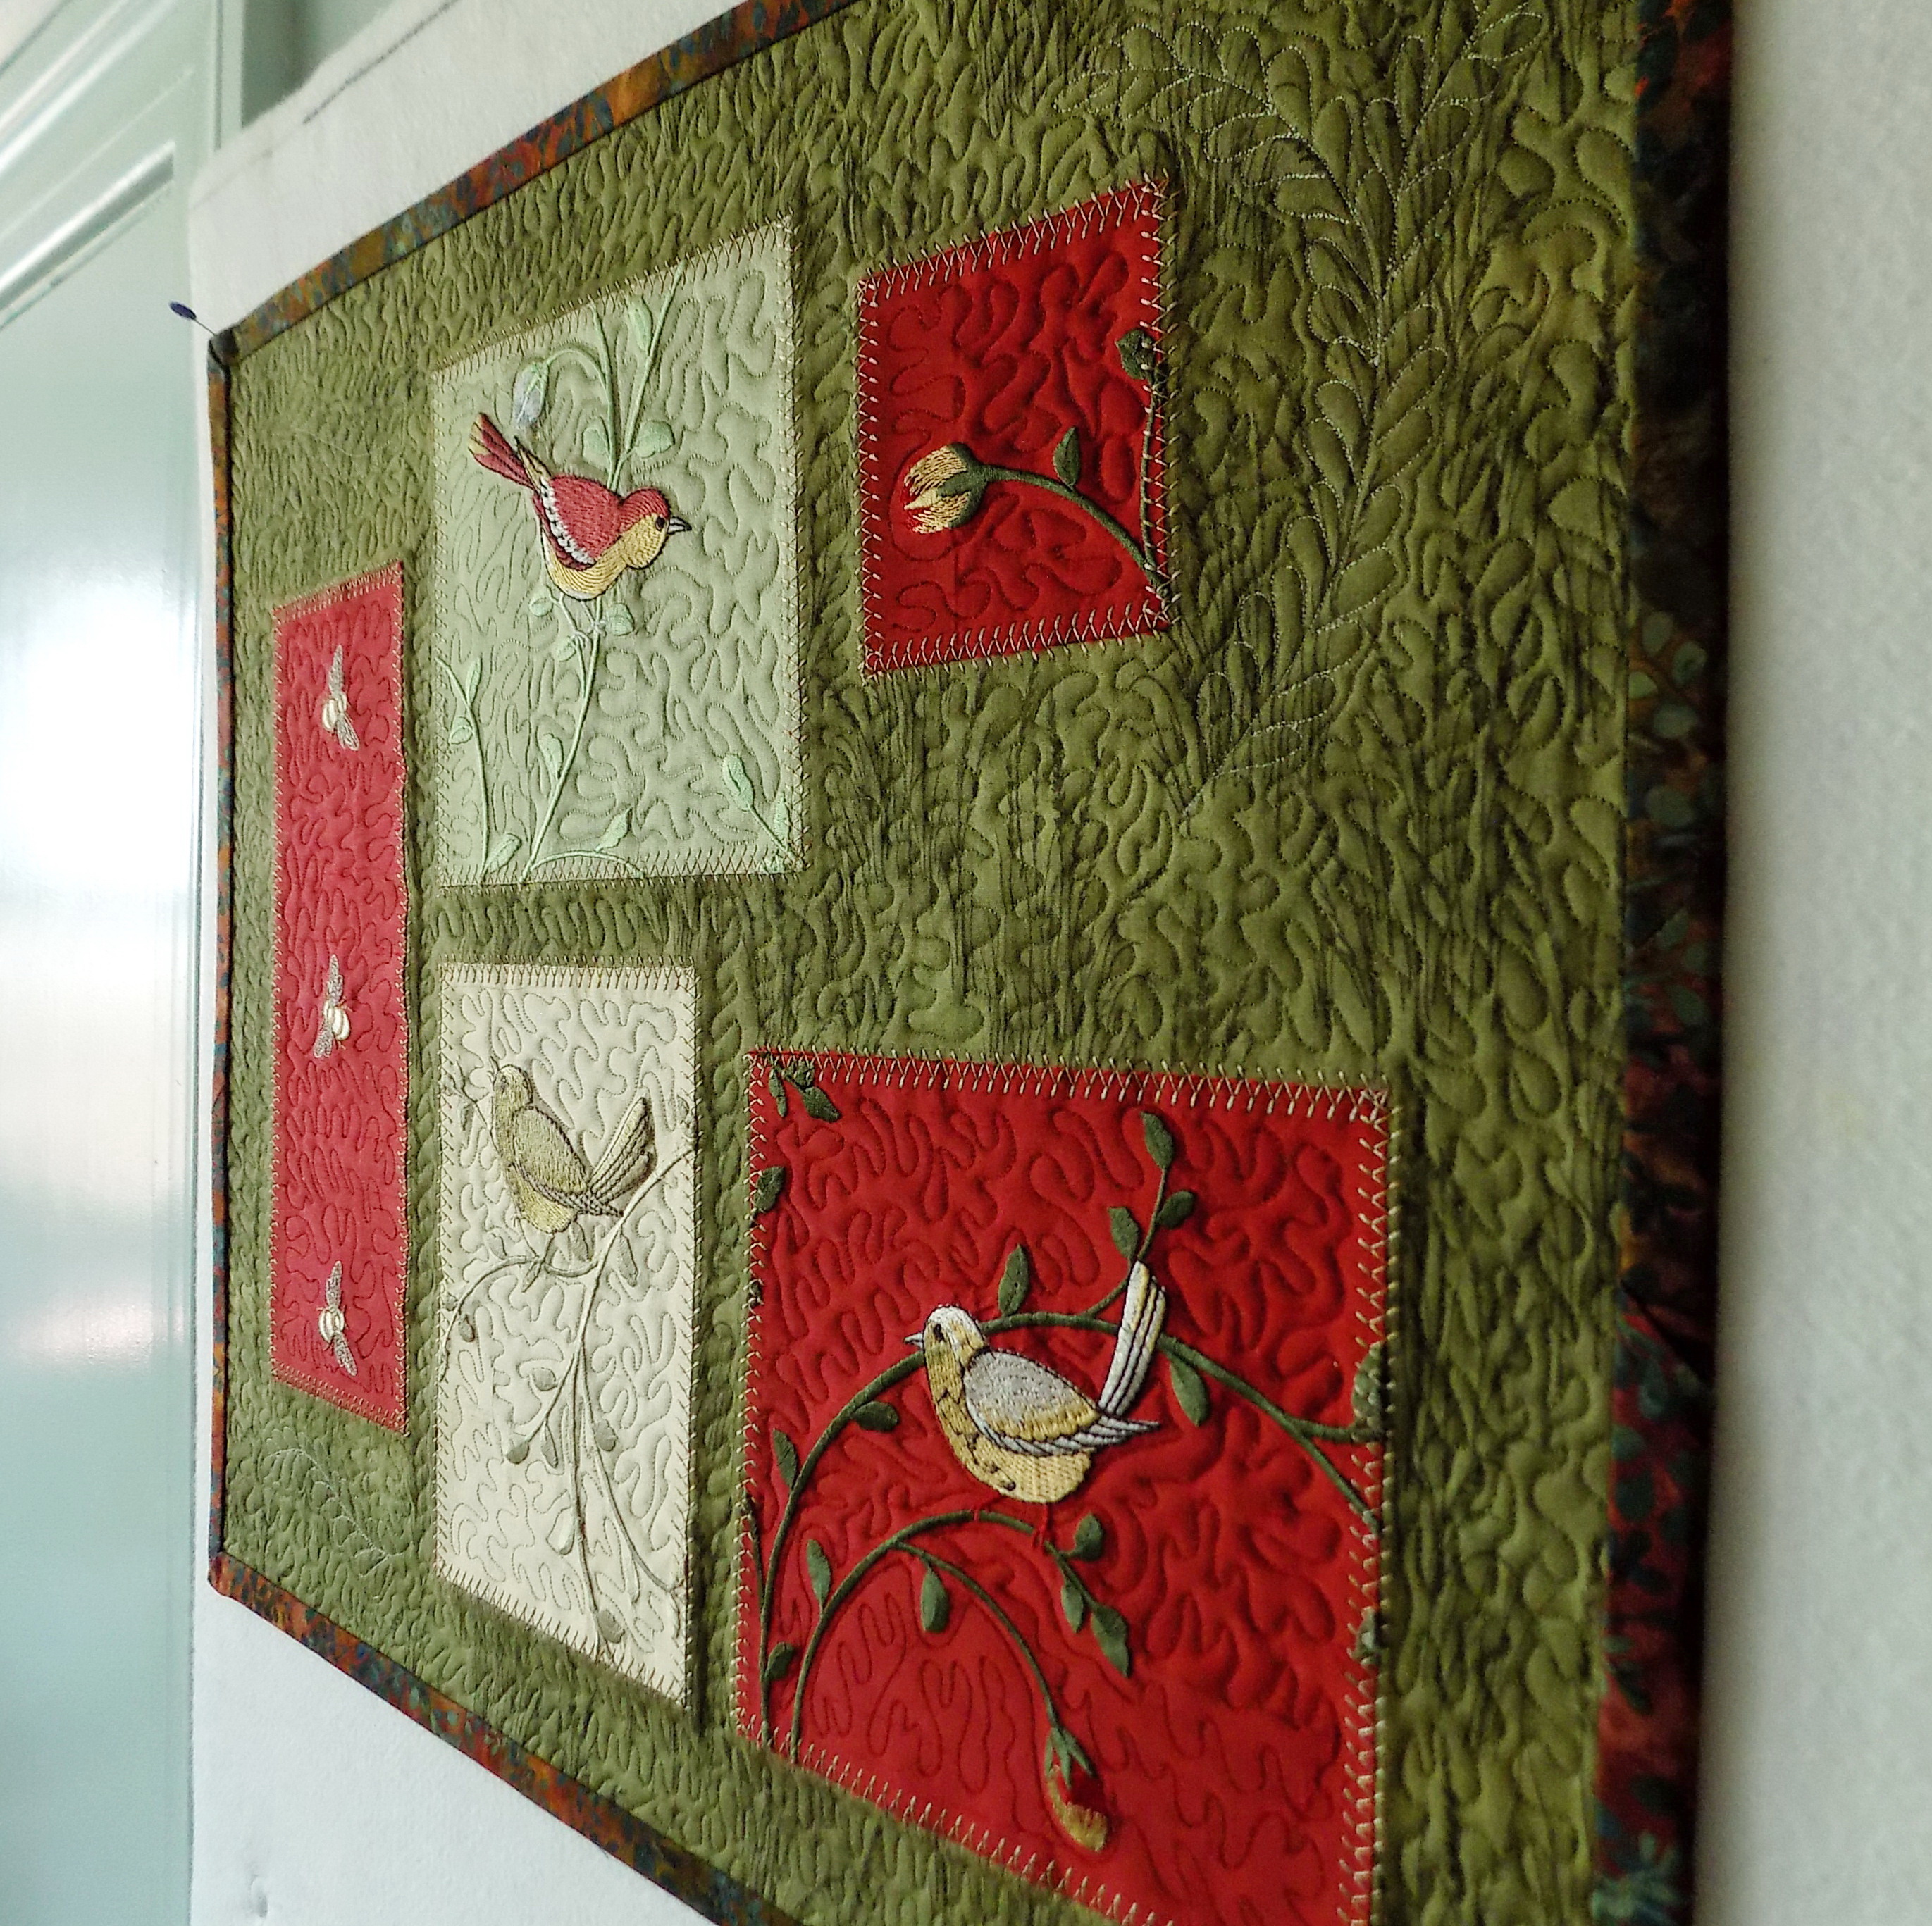
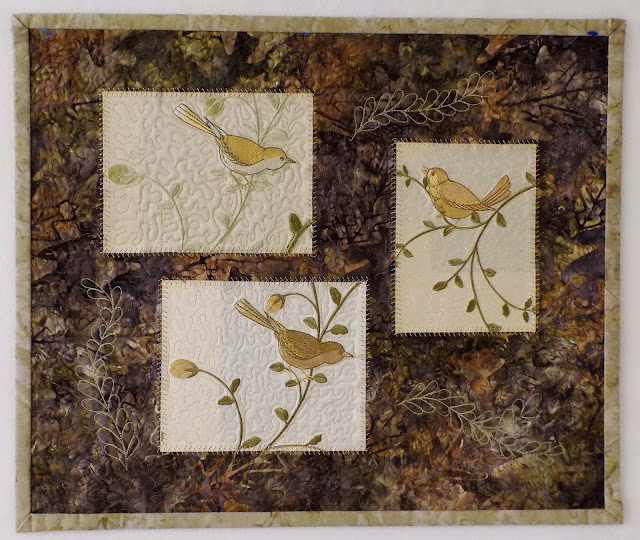
Designing and working with fabric and quilting, especially landscape quilts, is my passion and my sanity saver. Along with knitting, it is how I would choose to spend nearly all of my time if I could. I refuse to give it up. However, I have had to make some adjustments, and might have to make more as time goes by.

Here are some of the changes.

1. Working smaller....size does matter. πŸ˜€ No more 40 or 50-inch landscapes; I try to keep them
    under 36 in. long or wide. Bed quilts are now batted and quilted in thirds or fourths to cut down
    on weight at the machine, adding and fusing the batting sections as I work from the center out.
    AND I recently discovered a local guild that will accept quilt tops that they then quilt and give
    to charities.
2.  Using more machine-guided stitching and less free motion...I could insert a "sad" face here. I love
     the variety and grace of free motion. But it's also fun to incorporate decorative machine stitches.
3.  Exceptional care using the rotary cutter...my left hand can suddenly spaz while holding the ruler
     down.
4.  Thinner batting, also for less weight at the machine. To my relief, the quilt texture is still
     surprisingly good.
5.  Somewhat slower and more deliberate movement around the studio, due to balance issues and
     slower reflexes. This one has been a challenge--I'm used to moving fast and gracefully
     for 60+ years. A couple of minor falls have nipped that in the bud.
6.  Shorter blocks of time spent in any one place or position (leg stiffness can make switching
     places and tasks necessary anyway).
7.  Fewer blog posts, due both to slower quilt production and slower typing.
8.  More patience with myself, especially with fine motor movements such as threading a needle.

I am fortunate so far that the tremor is almost entirely on the left side of my body, while I'm right-handed. But for quilting we depend on both hands for nearly any associated task. So tremor medication is necessary, but there's a fine line, for me at least, between calming the tremor and becoming too sleepy to focus. So, some tremor and some stiffness as well have to be endured and worked around.

And yes, my neurologist keeps me updated on all the latest medical info and PD exercise/therapy groups. But I love my walks with Susie, my son's "Mamalaw" (we usually get in about 3 miles a week in decent weather), and quilting IS my therapy. And knitting and gardening--especially weeding and trimming.

Any of you fellow quilters deal with PD? I'd love to hear any tips you might have for continued comfort, efficiency and quality in quilting. Feel free to comment below. We're all in this together!

All the best,
Linda

Saturday, March 26, 2022

The Birds and the Bees (Part 2)

Work has progressed since the previous Birds and Bees post and now all four quilts are (nearly) finished. A hanging sleeve on number 4 is all that's left to do. Here they all are, together on the design wall.

Again, this project was all about rescuing some beautiful upholstery fabric samples from a potential date with the landfill...birds and bees, embroidered in silk thread on 100% silk fabric, which I cut out and fused to various cotton backgrounds. The edges were secured with a decorative machine stitch, but both the cotton backgrounds and the silk panels were stippled in free motion, mostly in matching threads so as not to distract the eye from the stars of the show--the birds and bees! Check out the previous post (about the brown quilt, number 1) for more detail regarding the process.

Here are better photos of quilts 2, 3 and 4:

21 in. wide x 17.5 in. high

23 in. wide x 18 in. high

24 in. wide x 17.5 in. high

Here are some "texture shots":


And here are some bird (and bee) panel closeups:


All four quilts are in my Etsy shop now (https://www.etsy.com/shop/LindasLandscapes?ref=shop_sugg) and are looking for a good home. 

Thanks for checking theses tweeties out! Please consider checking with your local upholstery shop for possible availability of discontinued sample books for your own quilting or craft projects. This was a fun and rewarding recycle project.

And speaking of birds, which are in mating season just now, happy spring (or autumn if you're in the southern hemisphere)!

Linda

Wednesday, February 9, 2022

The Birds and the Bees (Part 1)


Many times over the years, I've dragged this upholstery fabric sample book out of storage to contemplate how these beautiful embroidered birds might be used in a wall quilt.


The sample book was given to me--along with 140 others--by an art teacher who was moving house and clearing things out. These are just a few of the fabrics; there are others as well, all  in the same sample book.

Originally I thought I'd cut the birds (and bees) out of the fabric and use them in landscape quilts, discarding the backgrounds.

But the backgrounds are 100% silk, as are the embroidery threads...why not strategically cut the birds apart along with some of the background, which includes lovely stems and leaves, and feature them as panels in a (non-landscape) wall quilt?

So the first one was completed this week, except for a hanging sleeve, and 3 other bird (and bees--who chose not to fly into this one) quilts are now in various stages of progress. This first one is the most neutral in tone; the others will be more colorful.

The three panels were fused onto the batik print background with Steam-a-Seam II Lite, then edge-stitched with a programmed sewing-machine stitch in the heirloom category, with tear-away stabilizer pinned behind each panel. Fusible fleece was gently fused (no pressure with the iron, just heat) to the entire back using parchment paper between the iron and the fusible fleece. A backing fabric was then pin-basted beneath them in preparation for quilting. The backgrounds, both the batik and the silk panels, were free-motion stippled in matching polyester threads, but not before a few free-motion "feathers" were stitched in contrasting thread, where space allowed. The quilt was then steam-blocked and checked for squareness. Binding was made with 3-1/4-inch-wide batik strips on the sewing machine and handsewn on the back. Here are a few closeups, and a texture shot (click on photos to enlarge):


You can vaguely see the shadow of the paper frames that bordered the backs of the fabrics in the sample book. Removing those paper frames was an impossibility--obviously a very tough industrial glue was used. I quickly decided the paper frame shadows would be part of the quilt's charm, as well as a shout-out to creative recycling. 😊


This next photo was taken before the quilt was stippled, but it displays the lovely heirloom machine-stitching better.


And last is the "texture shot"...the lighting in the room always necessitates a horizontal angle to convey it best. (Not sure where that piece of red fuzz came from, but it's gone now. 😏)


I hope you'll try this if you happen to have, or can get hold of, an upholstery sample book featuring beautiful embroidery.

Thanks for stopping by!

Linda