Friday, October 18, 2013

It's in the Bag

It's kind of a big day in the studio, because it's one of the scariest in the landscape quilting progress, at least for me. That's right...it's time to take all the pieces (many of which were added since last week's post) off the temporary layout for this new free-motion landscape...and bag them up for later, when they'll be fused or glued into place.


It's almost as if your quilt goes away...poof! That's why it's so scary. But throughout the preliminary design process, nothing is permanent anyway. Designing is not about permanence. This is the time to be totally flexible. Time to try different fabrics, values, colors and textures. Time to play with placement, additions, omissions, and fun details--although I often save the finer details for later.

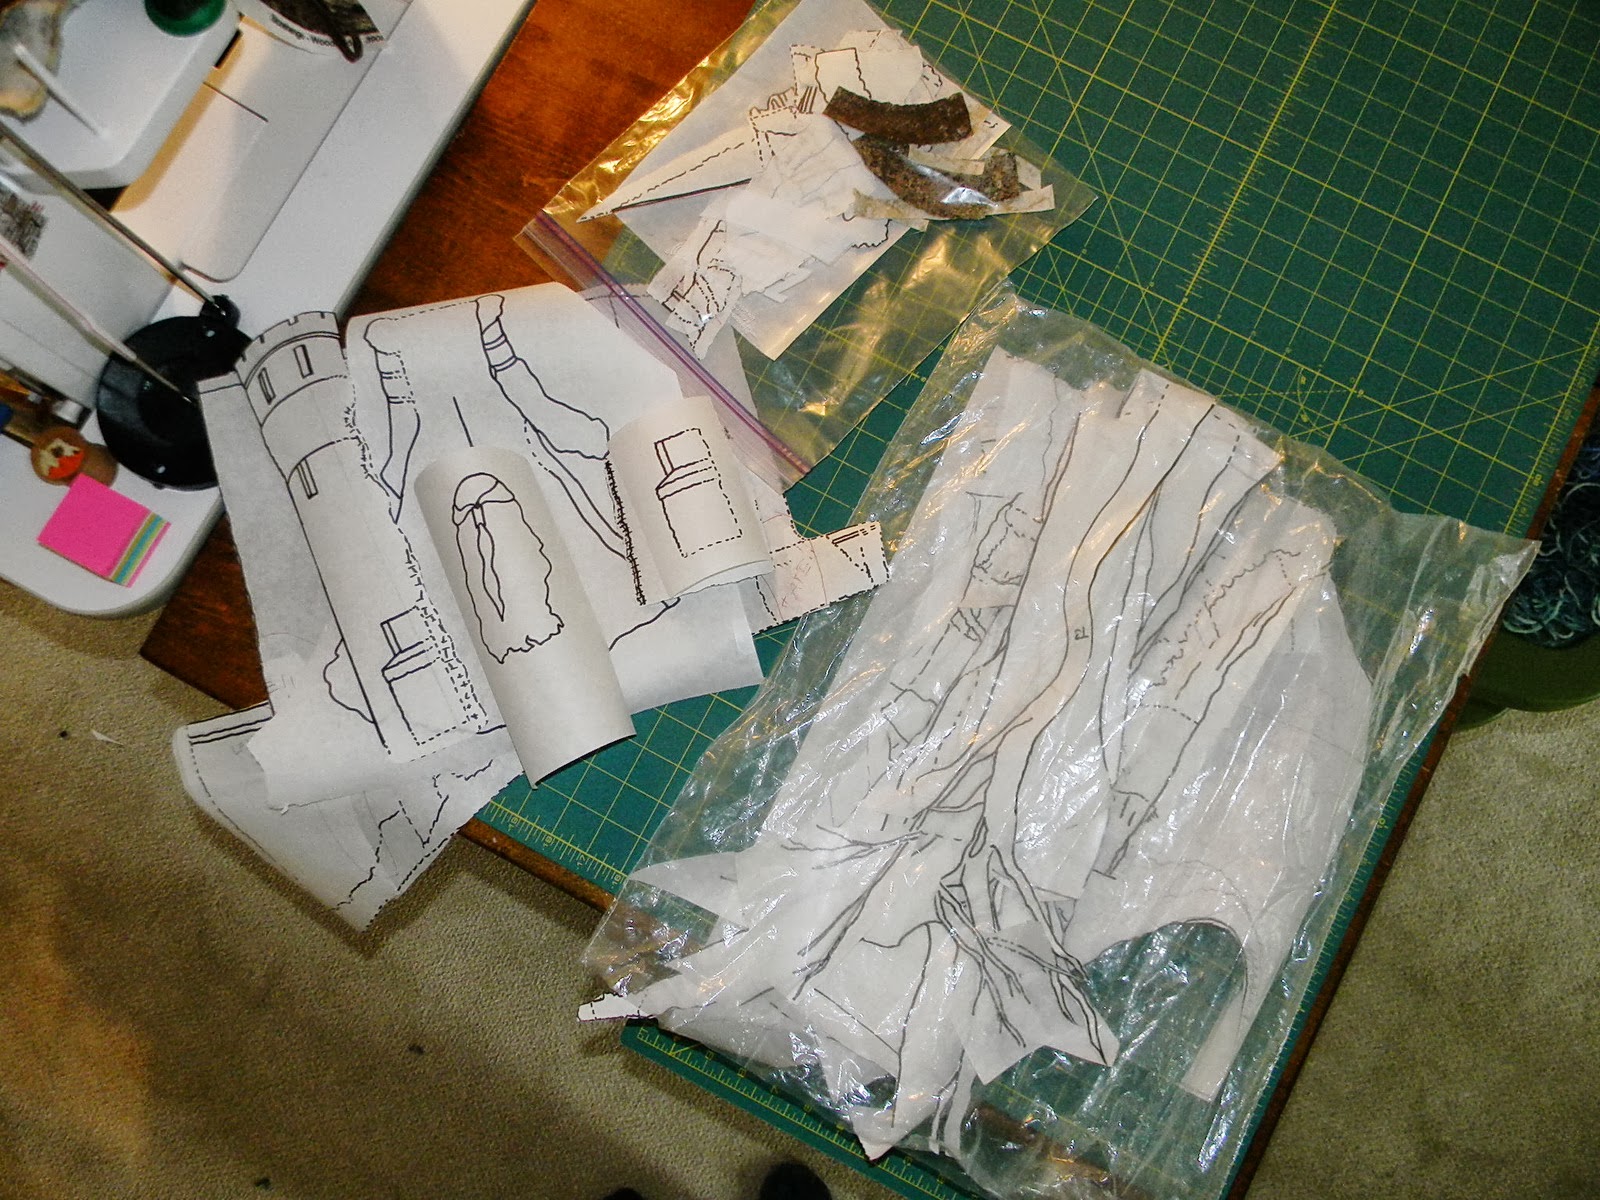
So, as of lunchtime today, the fabric pieces are grouped in plastic bags (generally according to size, and/or areas of the quilt). The exceptionally long or large pieces are on the design board, a convenient place to park them for now. If you can't do that, find a large plastic bag, a drawer, a box, a shelf, whatever, and put them there. It's particularly helpful if you can keep them in a place where they don't have to be folded--otherwise, they may have to be ironed again before gluing/fusing them down. Why iron more than once if you don't have to?


The freezer-paper pattern pieces are also bagged, even though most of them will never be needed again. The thing is, you never know--a day or two later you just might decide you want to use a different fabric for a particular piece. If so, you're ready to iron that pattern piece onto the new fabric and cut it right out. Never throw away a pattern piece until the quilt is done. (And even then, I keep some of them. I'll get into the 'why' of that in another post.)


The few pattern pieces that aren't bagged are pieces I still need to work with--like putting battlement details and arrow slits on the tower fabric. That didn't need to be figured out for the general layout of the quilt, but it will need to be done--details cut and fused--before the tower gets overlapped by the main garrison piece (the big, gray stone wall).

Next up will be tracing the original drawing, albeit with changes, on a full-sized vinyl overlay. Easy and kind of fun!

I want to switch gears here just for a second, especially for any readers who are local (Louisville, KY area) and who happened to know Linda Bowles, owner of Moore's Sewing and Learning Center. This is the lady who has so generously exhibited my landscape quilts in her shop for the last two years. Linda passed on Wednesday, after an illness that never got her down until the very end. She was one of the kindest, most supportive and loving souls I've ever met. Her family, staff and customers, including me, will miss her immensely. Moore's will never be the same without her smile, her cheer and her hugs.

Hooking up with Leah at FMQ Friday and Sarah at Whoop Whoop Friday--even if I'm not quite as whoopy as usual. Linda Bowles would want that. Anything to do with sewing/quilting/embroidering was something she was always ready to celebrate!

Have a great weekend, everyone!

Linda

Friday, October 11, 2013

Guesses and Messes

Last week marked the beginning of a new free-motion quilted landscape, this time using a photo--which involved enlarging, a lot of tracing, and the making of twenty thousand million pattern pieces. (Ok, actually 26. It just seemed like a lot more.)


Then came choosing the fabrics--one of the most fun and yet most frustrating parts in the process of making a landscape quilt. Half of the time, there aren't enough choices; the other half, there are too many. In this photo, folded fabrics are being auditioned for the trees (one of which was accidentally left out at first...yep, screw-up number one...that's when you know you're on your way! :)
Again, these were just auditions at this point...except for that tree on the left. I was so sure it would be the perfect foreground tree, that I went on and cut it out with the pattern piece--a good 30 inches long. Yep, trial and error number one (as opposed to screw-up number one)--the tree just doesn't stand out enough. It blends in a little too well with the stone wall, which is supposed to be far behind it.

So that particular tree was rejected. But in landscape quilting, rejects are never wasted; just saved for a future project. The replacement tree in the next photo is much darker, which is important, because usually the elements in the foreground need to be darker than those in the background, for the sake of depth and perspective. (If you're not convinced of this, stand on a hill somewhere and look out over the distant landscape. Generally, trees, mountains, other hills, and even buildings will appear progressively lighter as they near the horizon.) There are exceptions, such as that skinny tree, which needs to be either very dark or very light in order to contrast with the stone wall. Lighter would probably be better there--it's a bit stark looking even if it is skinny. 


 Meanwhile, the studio is gloriously messy, as happens when you're deeply immersed in a new project--too much creativity flying around to pay all that much attention to cleanup. And this photo doesn't even include the huge pile of pattern pieces lying willy-nilly all over a tabletop. 


A couple of new elements were added today:


The curling silhouette (because I ironed him onto paper-backed fusible) makes it look like the guy is trying to escape hell fire, but that will change as the light behind him gets toned down and window bars are put on top of him. Then he'll just look all brooding and mysterious as he watches the woman approach on the path. At least that's the plan.

Hooking up with Leah Day over at FMQ Friday and Sarah Craig at Whoop Whoop Fridays. Among other things, Leah has included a link to instructions for a method of finishing your quilt's raw edges without binding on top. Sarah has announced the winner of the traveling stash and is featuring some linkups to other folks' work. Check out the hookups at the bottom of both Leah's and Sarah's posts--as always, a super booster shot of inspiration.

Have a great weekend, everyone!

Linda

Saturday, October 5, 2013

Line by (Missing) Line

This week has been all about two things: precision and patience.

I don't normally work from photos. Ideas usually just kind of pop into my head, sometimes out of the blue (thank you, Spirit) and sometimes when I see a particular piece of fabric. However, as mentioned in my last post, this new project is based on a photo (left) my husband took in February at Lookout Mountain in TN, altered by superimposing this medieval-costumed lady, from a free stock photo on the internet, over me. (Believe me, you will never see a quilt with me as the focal point.) I also blotted out the railing, using the cloning feature in my photo program.

So as mentioned in the last post, I printed this out in a 16-page poster-style, gray-scale shadow/highlight-mode photo, killing two birds with one stone--more easily determining color values and enlarging the photo to roughly 32" x 40".

The first thing to do was tape some freezer paper together for an overlay on top of the 16 spliced pages, then start tracing. In pencil, by the way--this is not the time to go permanent. Why? Several times the lines had to be erased and re-drawn, simply because in this particular photo mode, there were often no actual outlines--just shadows and highlights. When I wasn't able to guess at the outlines, I looked back at the color photo for reference and drew them in as best I could.

At this point it occurred to me that killing two birds with one stone maybe wasn't a good idea. Maybe I should have printed a separate photo for shadows and highlights. Tracing would have been a lot easier on a straight-up black-and-white photo with actual outlines!
Anyway, it got done. Then it was time to ink the lines. That turned out to be fun. A medium-point Sharpie glides beautifully over the dull (paper) side of freezer paper, and it's gratifying to see a simple line drawing at the end. (Shadows and highlights will be dealt with later.) By the way, the extra chunk of building I added in the righthand background with those barely visible windows--that's going bye-bye. I thought the photo needed that, but changed my mind after it started looking like an old office building to me. Way too modern.


Notice a few trees were left out. One reason: The large window is now in the clear, allowing a shadowy male figure to be sketched in behind the bars. The other reason: too many elements can clutter up the scene. But that's a personal choice. You just do what looks good to you.

Next, pattern pieces were traced--again on freezer paper and this time in ink, since the lines were no longer iffy--for the various elements in the scene: 26 pieces altogether. Overlap allowances were added wherever they would be needed, and the trees were numbered, both on the drawing and the patterns, for quick reference.
Having these pattern pieces to iron on to the various fabrics will not only give me the exact shapes to cut out, avoiding any wasted fabric, but will also allow me to easily position a pattern piece precisely over a particular area of the fabric if desired.

And now comes the real fun...choosing the fabrics! For the stone structures, walls, and flagstone path, here are some possibilities from my fat-quarter stash. I tried several combinations but still haven't made a decision. 


Getting ahead of myself, though, because first to go down will be the sky fabric. I have several purchased ones, but they were all too cut-up or too full of fluffy clouds (boring in this particular scene) or made it look like a storm was rolling in--not the look I'm going for.


Then I thought of the Kona PFD cotton I 'dyed' with Tsukineko inks months ago. The colors are fairly vivid, and if I can cut and piece these bits of fabric just right, it might work. The 'joins' will have to be hidden, which is where the tower (pattern piece not shown) and trees will come in handy. I'm fiddling with that now, and hope to figure it out today.

Foundation muslin smoothed out and clamped down over inked drawing. Reference marks will be made at key points, in pencil. Unfortunately, that water-soluble center line will have to be rinsed out--it's showing slightly through the sky fabric.
Time to sign off and get back to it. Hooking up with Leah Day's FMQ Friday (what is that secret project she's up to??) and Sarah Craig's Whoop Whoop Friday, where you can sign up to be the next recipient of the traveling stash--a box full of pretty fabrics and notions! Read about it there.

Have a great week!

Linda