 |
| This is most of it, but not all. |
Here's a tip: save all those big mixed-greens containers you might be getting from the grocery. They really came in handy!
There are probably enough strips and backing squares for at least 4 q-a-y-g quilts. The quilts will be donated to the Center for Women and Families here in our town. The most recent quilt we took in will be auctioned off at their annual fundraiser in February. This makes me very happy, and all the more excited to make the next one.
After all that cutting, I was itching to get back to the sewing machine. So I pulled out something that has been on my radar for quite a while: Martha Ginn's article on Ghost Quilting in the January 2013 issue of American Quilter Magazine.

You just fuse a section of print fabric onto a solid fabric, and then sketch extensions of the print designs out into the border (hence the 'ghost' in ghost quilting). It can be as precise or as casual as you like. Then make a quilt sandwich, baste, and stitch both the print outlines and your extended lines with free-motion quilting.
It's fast and easy if you keep it small (I used a fat quarter for the background), and it's fun! You can paint or thread-paint any, all, or none of the 'ghost' parts--your choice. In this case, there needed to be a little color out in the border to balance the overall design, so another flower was sketched there and painted, similar to the printed one.
 |
| Before blocking |
Then the piece was steam-blocked. For anyone who is familiar with my work, you already know why I always block. If you're not familiar with it, these two photos pretty much speak for themselves.
 |
| After blocking |
In case it isn't obvious (click on the photos to enlarge), the steam-blocked version always turns out smoother and prettier than the fresh-stitched version, which is generally somewhat warped. This makes a huge difference in the way it looks when bound and hung on a wall.
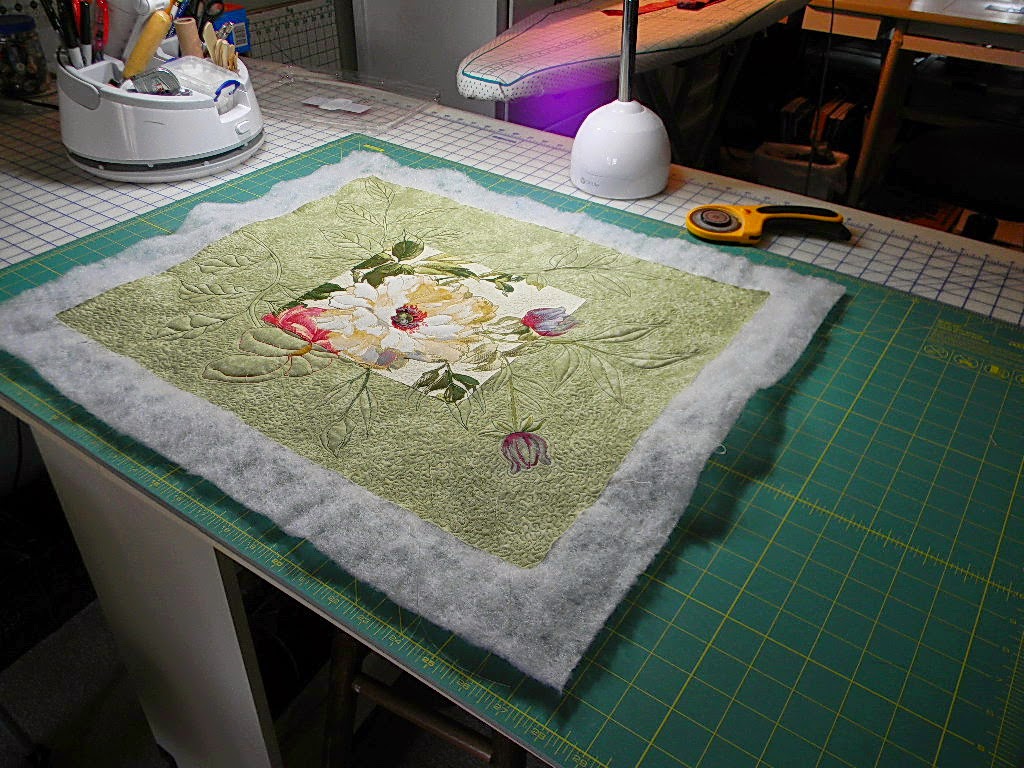
After blocking, the piece was squared and trimmed. The binding, made from roughly 1/3 yard of a batik print, was soon attached.
 |
| Pay no attention to the little piece of red thread that doesn't belong here--just forgot to use the sticky roller! |
Again, this was fun and quick--as well as a great way to practice free-motion quilting. It is NOT supposed to be perfect...far from it! The whole idea is for it to look like a sketch. The leaves could all have been painted, but that would have slowed me down. Besides, I liked the outlines just fine.
Meanwhile, the studio bathroom has been partly converted to a winter greenhouse for the houseplants that had taken a summer vacation outdoors.
 |
| Every bathroom should have one. Just don't try to take a bath. |

On the baby front, the yarn destined to be a baby afghan for our first grandchild (a girl, named Lucy, due in 4 months!) arrived this week, and I cannot wait to start! James C. Brett's Flutterby Chunky, a chenille baby yarn, is arguably the softest yarn on the market. It reminds me of the fur on our pet rabbit, Nibbles, when he was a baby (some 50 years ago)--it's that soft. The current plan is for a crocheted fan-shell pattern.

In progress is a vintage pattern (1960s) sweater, bonnet and booties set in a pastel green yarn my friend Kathy gave me, part cotton but mostly acrylic, with a beautiful sheen. The bottom two-thirds of the sweater is a wide ribbing. The yoke is in a mock cable pattern (barely started here). Just gorgeous, and definitely feminine.
One more photo, below, shows a tip that I'm pretty sure came from Sarah Ann Smith's wonderful book, Threadwork Unraveled.

The pincushion is labeled at the top with the first letter (or two) of each type of machine needle you have. The different sizes for each are written beneath each letter.
The pin is placed according to what type/size needle you currently have in your machine, and stays there until you change to a different type or size. You can also stick new or slightly used machine needles in their respective spaces so that they'll be ready and waiting when needed. I love this tip and wish I'd seen it years ago!
Time to sign off and go knit. It's also time to get out the flannel sheets...first freezing temps of the season tomorrow night!
UPDATE: If you love landscape quilts and/or free-motion quilting, do yourself a huge favor and check out the latest Free Motion Mavericks blog entry from Lizzie Lenard's Vintage Sewing. I'm also linking up with Sarah Craig's Whoop Whoop Friday blog...go there for tons of inspiraton!
Linda