Wednesday, August 31, 2016

Batik Scrap Stash-Busting

Scraps are scraps, but for some reason batik scraps seem special to me. Maybe it's because they work in landscape quilts so well. So mine have their own drawer, where they're sorted by color family.


After six years, the drawer is full. Time to do some batik scrap busting.

 Strips were cut, some remaining straight-edged (many were from leftover binding) and some quickly given a wavy edge with the rotary cutter.


For a sky, raw-edge strips of purple, pink, red-orange and yellow-orange batik were glued (edges only) to a piece of batting (which had already been fused to a backing fabric), each strip slightly overlapping the one above it.

Then came some mountain shapes, then strips for water. Last, a wider yellow-gold strip was glued down for beach.

Sailboat fabrics were trotted out for auditioning. Paper-backed fusible was applied to the wrong side of the chosen boats before cutting them out.

One edge satin-stitched; lots more to go.
All strip edges were quickly stitched down with Superior clear Mono-Poly on low tension.

Deciding to satin-stitch the raw edges of the sky and mountains, I chose several colors of 40-weight polyester thread (Isacord) for the top and a 100-weight polyester (Invisifil) for the bobbin. 

Using a dense (.35 stitch length), a medium-wide (5.0) zigzag stitch, a size 14 topstitch needle and the open-toe dual-feed foot, I spent two pleasant afternoons covering raw edges at a moderate speed. Not a single thread broke or bird-nested.


This area of the water was accidentally shorted on fabric. Enough batting showed through that I didn't trust the satin-stitching to cover it. What to do?

Easy. (This whole project is easy!) Just cut out another piece of fabric and glue it over the area. Here you see it before the raw edges were stitched down:


Also, see that all-too-obvious vertical join? No problem there, either. It will be covered with the sail of one of the boats.

Oh, and what to do with the leftover trimmings from the strips?


Cut them up into little pieces for a confetti quilt! No waste here when it comes to batiks. Even the selvages get cut up. I think of these little bags of confetti as tubes of paint, and there's quite a palette accumulating in these two lettuce containers.

Next time, this scrap project will be a finished landscape quilt.


Moving on to some news from the 2016 Kentucky State Fair: The Visit received first place in the landscape/pictorial category. My first blue ribbon ever!

Type garrison quilt into the search box (on sidebar) to see posts about the making of The Visit.

Have a wonderful weekend!

Linda
Sunday, August 21, 2016

Hearts and Flowers (and Shamrocks)

Considering that a month ago, I had no idea how to even begin to make this quilt, it amazes me that my granddaughter Lucy's first-year baby-clothing quilt is finished.

Here are the remaining nine blocks (the first three were on last week's blog post).

First, six more hearts (click on any photo to enlarge):


You can see by the third photo above, just how 'poofy' this quilt is.

Next, the two blocks that my heart shapes just didn't work for:


The flower--that's what it looked like to me--was front and center on one of Lucy's dresses, and I didn't want to cut into it to make a heart. The shamrock worked well not only because of the color, but in honor of Lucy's Irish heritage--and because the heart template didn't fit over the words!  :)

Last, the heart that I was so worried about because of the delicate, pleated organza overlay:


I used as many of the trims and embellishments that I could from her clothes.

As you can see, the twelve outfits and their coordinating backgrounds made for a colorful quilt top!


I like the back almost as much as the front. Just wish I could remember where this awesome fairy fabric came from! It has some glitter in it, but that doesn't show in the photo.


This is a quilt I'm hoping will end up very well-worn and fondly remembered by Lucy.

Have a great weekend!

Linda
Thursday, August 18, 2016

Sooner Done than Said

Progress is going really well on the first-year baby clothes quilt for Lucy. A few of the blocks:


One reason it's going so well is, yesterday I suddenly realized the actual quilting was (unexpectedly) finished! I had done SID on all the sashing and then echo-stitched once around each satin-stitch-edged applique. I had already chosen several different variegated threads for the block backgrounds, but have put them all away because I'm so happy with the results at this point. The quilt is puffy and light but well secured.

The main reason for that is the batting. This is the first time I've ever used Quilter's Dream "Puff" batting, and I love it! Thank you, Margie, at Margie's Country Store in Madison, IN for turning me on to this product. Among its other great qualities, it allows for up to 10 inches between stitching lines--perfect for these large appliques.

Binding is in progress now. I'm also really pleased with the backing fabric. Full-quilt photos next time.

Have a great weekend!

Linda

Thursday, August 11, 2016

Hearts for a Heart-Stealer

Being principally a landscape quilter, and having made only a few very basic bed quilts, I'll admit to feeling a bit nervous when my daughter-in-law Shannon suggested that a quilt be made from my granddaughter Lucy's first-year baby clothes. Not all of them, of course!--just the ones she wore for each month-anniversary photo.

Three times over the last six months, those cute little outfits were pulled from the bag and laid out on my cutting table. All three times they were put back in the closet, untouched. I had no clue where to begin, even after viewing several such quilts online. Totally stymied. Then last week the bag came out again, and this time it stayed out. Inspiration had finally struck, however tentatively.


Fortunately Shannon had said I could cut up the outfits. What worried me, though, were all the jerseys, rayons and sheers in this pile. Cottons and cotton blends are all I've ever used in bed quilts, although I do have a garment-sewing history with jersey. So I decided to just take things one step at a time and try not to think too far ahead.

For the backgrounds of the twelve blocks, six colors of Hoffman batik hand-dyes (included in the photo) were pulled from my stash.

A simple heart shape--for the little girl who has stolen our family's hearts--was drawn on tracing paper for the applique pattern. (Two of the outfits weren't compatible with that shape, because of lettering and fabric print. I'll show those in a future post.)

Each applique was fused to Pellon Featherweight interfacing, which took care of any stretch problems for the jersey and rayon, and gave the thinner fabrics more body.


But here's the piece de resistance, as far as I'm concerned, for this blog post--centering the appliques on the blocks.

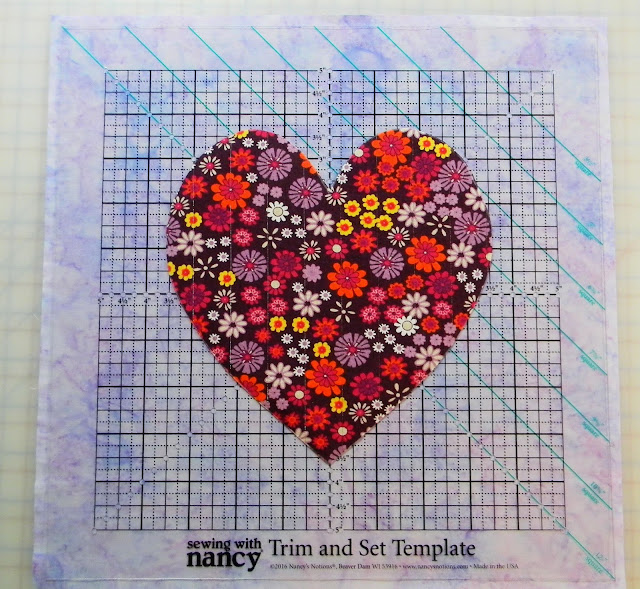
That process went super-fast, thanks to this very reasonably priced template I found at Nancy's Notions last month. I'd had no idea how soon it would come in handy.

Only two tiny marks needed to be made on the block backgrounds--right through the template holes nearest the top and bottom points of the heart. The template was removed and the applique was quickly re-positioned between the marks, ready for pinning or fusing. (I pinned, not wanting yet another layer of fusible to stitch through).

(Enlarge the Packaging photo to read about other features of this time-saving template.)


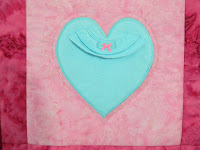
The applique that most concerned me was from this little purple dress with a beautiful, accordion-pleated organza overlay (I take back what I said....here is the real piece de resistance--and I don't mean the dress!  :).

Lucy at 8 months
The purple under-dress was jersey--no problem after fusing it to interfacing. But it looked plain and dull without the pleated overlay. Somehow, some way, the top part of the overlay needed to be salvaged and stitched over the jersey heart, without distorting the organza pleats.

I'll save that for next time. Long story short, that's done and it came out looking fairly good.

That and more progress next time.

Have a great weekend!

Linda

Thursday, August 4, 2016

July Quilty Box

As mentioned in the last blog, here is the wall hanging made from the gorgeous hand-dyed fabrics by Kathleen Starr, which came in the July Quilty Box. Again, I did my own thing, something ridiculously simple and fast to brighten our basement hallway.

34" x 42"

It looks a bit like a paint chip chart, but if you look closer you'll see that there are four rectangles of each color, and they kind of radiate from warm at the center to cool at the edges. That's the idea, anyway. SID was done first, and then each rectangle was stitched in free motion in whatever design appealed to me at the moment.

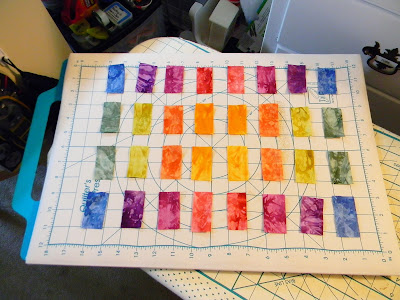
Planning it was made simpler by trying out arrangements of a corresponding number of scraps of each color on my 1-inch grid pressing mat, before bothering to audition the full-size rectangles on the design wall.


Next up is making a quilt for my granddaughter, Lucy, from the outfits worn for photos taken on each month-anniversary of her first year.

Have a great weekend!

Linda