Carving out a little studio time during 7 weeks of yard work (resulting in 32 big cans of yard waste and 5 lbs. lost, yay!), I was inspired by this tree fabric to begin a new landscape quilt...and to quilt that particular piece with a decorative machine-stitch, using the dual-feed foot. The stitch reminded me of snowflakes.
From there, compatible fabrics were pulled from the fat-quarter stash and quilted onto the batting and backing, one piece at a time. This is the first time I've pieced and quilted simultaneously. Saves a lot of strain on the body! [Most of the pieces were first auditioned together on the design wall.]
Anyway, next I quilted the piece for the water, using free-motion stitching with a holographic thread for sparkle.
Following that, a rock/water fabric and a tall-grass fabric were added and quilted in free motion...
 |
| (photo taken during audition, before quilting) |
...and then, some boulders and falling water (cut from a panel), to add depth to the scene.
An elk was cut from another panel and added...
 |
| (also taken during audition) |
...as well as an eagle---both outlined in clear mono-poly thread.
There was a problem, though...
See the vertical wrinkles? Believe it or not, I didn't notice them until it was too late---and there was no way to remove them. That should have been done earlier, with the 50/50 mix of white vinegar and water that I keep in a spray bottle, and then pressed with a hot iron (works every time). This would melt the holographic thread if I did it at this stage.
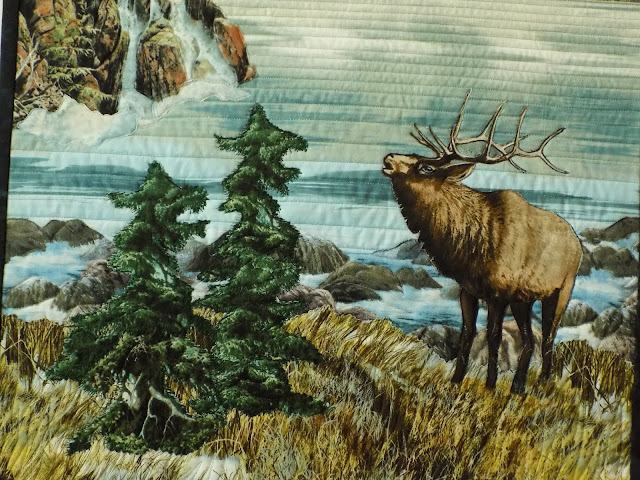
So, what to do? Cover those wrinkles! Two small evergreen trees (one by itself just looked weird) were cut from a wildlife panel fabric and "planted" close together in the tall grass (foreground). Landscape quilting is forgiving; there is almost always a fix.
Two little evergreens were also added across the river, for balance (see below). And here's the finished quilt, titled Misty Mountain Morning.
The elk looks a bit worried, doesn't he? I don't think the eagle is a threat. Maybe the elk is just saying hello to the eagle.
A sleeve and label will be added after some procrastination, now that the fun parts are done.
Everyone have a great weekend, be well, and stay safe!
Linda


Such fun to see your process Linda - I would never have thought of quilting the different elements before putting them together but how much easier it would be than having to manhandle (womanhandle?) a larger project through the machine. And the tip about the vinegar/water solution to remove wrinkles - thank you for that!
ReplyDeleteYou're welcome! I would do a test first on a scrap of the same fabric or maybe just on an edge, but I've never had a problem so far with dyes fading, and the vinegar smell goes away as soon as it's dry.
DeleteWhat a wonderful quilt! Isn't it nice to have gotten to the point where you don't panic over a mistake? The "correction" added a nice new element.
ReplyDeleteVicki, that is definitely a bonus of doing this for so long. Thanks!!
DeleteHad to drop by to tell you I do read your posts. I found this one so interesting. You really have an eye for detail and choosing your fabrics. Thanks for sharing your process. You are one talented gal!
ReplyDeleteJocelyn, thank you so much. I love sharing the ups and downs, mistakes and fixes. I'm so glad you found it interesting!
DeleteLove this quilt and all of the interesting things in it. I didn’t know that about vinegar and water for wrinkles- good to know!
ReplyDeleteThank you, Laura! I test first on a scrap of the same fabric, if I have one, or in the "margins" of the quilt. So far it's never been a problem, and the vinegar smell goes away after dry-ironing.
Delete