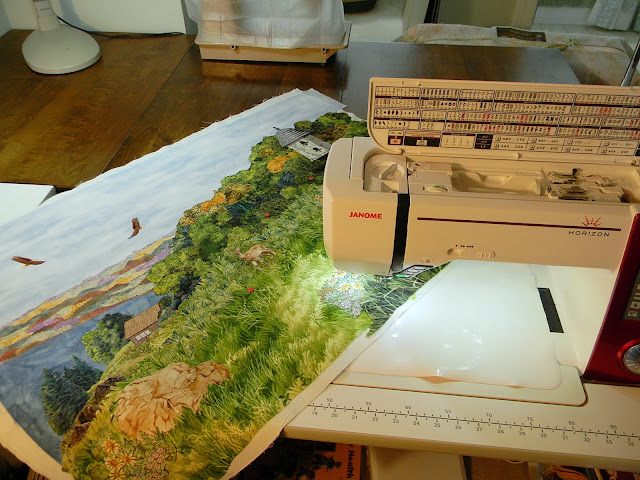
This week The Overlook was squared, trimmed, bound and blocked. I usually block first, but the quilting was fairly even and was spaced far enough apart that the quilt really wasn't much out of square.
After squaring it with rulers and a marking pen, I stitched a line all around, just inside my marked line. That's to secure any quilting stitches at the edges before the final cut is made on the marked lines.
 |
| After blocking. You can see the T-pins between the binding and the quilt. |
 |
| (also after blocking) |
The quilt just barely fit on my 'blocking box' --the bottom section of a large but shallow shipping box, which I perched on top of a card table. It was nice to not have to work on the floor.
The box has a squared line drawn in permanent marker around the edges. It also has a lovely dent from being squashed in the attic door (thanks, son), so I propped up that section of the quilt with a partly folded fat-quarter to keep it level.
Two layers of an old cotton sheet were laid over the quilt, misted with water until damp (not wet), then well-steamed a couple of inches above the surface with my iron.
The quilt was left untouched overnight and most of the next day. By then all layers were completely dry. Even though it was fairly square to begin with, blocking gave it a more 'finished' look, shrinking out any flabby sections and smoothing the whole quilt without taking away any of the texture or puffiness. It's hard to describe, but there's definitely a difference.
Both trees passed the final audition and were attached this afternoon by free moton machine stitching. This weekend one (or maybe two) of the three shrubs will be re-auditioned. If all goes as planned, the quilt should be finished early next week.
While the quilt was being blocked, the vinyl overlay used in designing and piecing the quilt top was spread out for cleaning---the idea being to wipe the 'permanent' marker off with rubbing alcohol, since any errant lines during the initial drawing had been successfully removed by those little alcohol pads that come in individual wrappers.
Well, so much for that plan. Apparently, if you leave permanent marker on vinyl long enough, it does become permanent. It did fade from black to blue (notice the upper half), but that's as far as the cleaning went. Then again, maybe it's the alcohol. As mentioned, I used the little individually wrapped pads when correcting my lines during drawing. But when attempting to clean the entire piece of vinyl, I used paper towels and isopropyl (rubbing alcohol) from a bottle--which didn't seem to smell nearly as strong. Might there be a difference? I wonder now. If anyone knows, please share. Didn't think to test it at the time. Maybe later.
Anyway, now the vinyl (and the paper it came with to keep it from sticking to itself) are rolled up on a mailing tube and labeled 'used vinyl.' I'll use it to paint fabric on, or for some other messy job. Very little goes to waste around here.
Time to sign off. Loving this fall weather and being upstairs with the studio windows open, but I do wish our fall color was better this year. Overall it's just been too dry. Here's a shot from one of the windows.
Before I go, though, I'm linking up with Whoop Whoop Fridays and Free Motion Mavericks. Check them out and get ready for lots of inspiration!
Have a wonderful weekend, wherever you are this fall (or spring, depending on your hemisphere).
Have a wonderful weekend, wherever you are this fall (or spring, depending on your hemisphere).
Linda


